Chapter 12 : Python OOPs Core Concepts
इससे पहले के chapter मे आपने केवल OOPS के Basics Topics के बारे मे जाना है पर Real Life Project create करने के लिए केवल Basic OOps काफी नही है | इस Chapter मे OOPS के Core concepts जैसे Inheritance , Polymorphism , Encapsulation को समझाया गया है | इस Chapter को अच्छे से समझाने के लिए Chapter Theory के साथ - साथ code , code Explanation , Tests , Practice Sets भी add किए गए है | दिए गए Chapter को पडने के बाद Website पर उपलब्ध OOPs के Core Concepts से संबंधित Practice Sets , Tests , Projects को Attempt करना ना भूले |
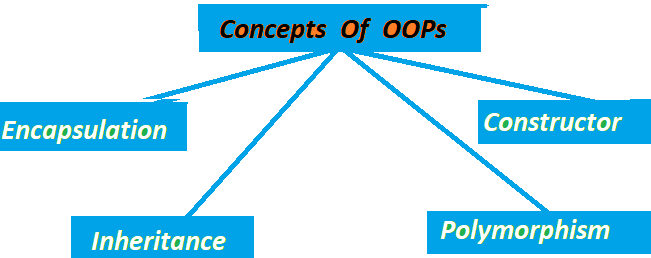
Concepts Of OOPs
Python Programming मे OOPs को maily Four Parts मे devide किया गया है | हर Concept का अपना काम है और सभी concept एक दूसरे से अलग है | OOPs को सिखने के लिए हर concept को सिखाना जरूरी है | OOPs के सभी concepts को नीचे समझाया गया है |
1.Inheritance
Inheritance OOPs का Interesting concept है जिसका उपयोग एक class को किसी दूसरी मे inherit करने के लिए किया जाता
है
| यानि की एक class मे दूसरी class के कुछ गुण प्राप्त करना या विरासत मे लेना | For example :- जिस प्रकार एक बेटा
विरासत के रूप मे
अपने पिता से कुछ गुण प्राप्त करता है उसी प्रकार एक child class भी अपने parent class के कुछ Methods , functions
etc.
को प्राप्त करती है | Inheritance का Code नीचे दिया गया है |
class DerivedClass(BaseClass):
    pass
Code Explanation
class = > class को create करने के लिए class Keyword का उपयोग किया जाता है |
DerivedClass = > DerivedClass वो class होती है जिसमे किसी दूसरी class को inherit करना है |
BaseClass = > BaseClass वो होती है , जिसको inherit किया जाता है |
pass = > pass वो जगह है जहा code लिखा जाता है |
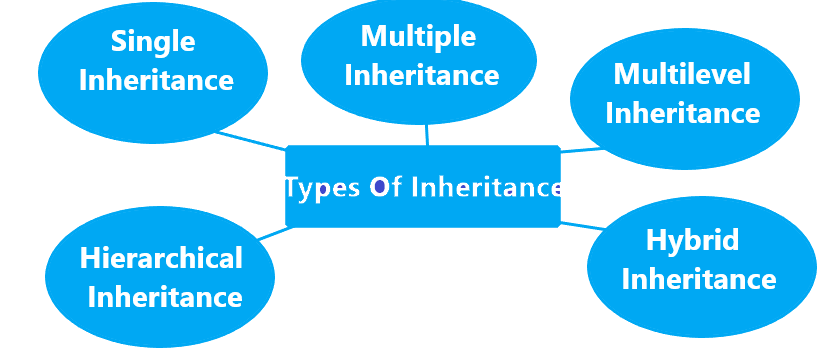
Inheritance 5 प्रकार की होती है |
Single Inheritance
किसी एक class मे किसी दूसरी class को inherit करना Single Inheritance कहलाता है | For example :- जिस तरह एक child अपने पिता के कुछ गुण विरासत के रूप मे लेता है | नीचे एक BaseClass को DerivedClass मे inherit करने का code दिया गया है |
1class father:
2    def display(self):
3        print("I am father class")
4class Son(father):
5     def show(self):
6         print("I am Son class")
7
8object = Son()
9object.display()
10object.show()
I am Father class
I am Son Class
यहाँ पर son class मे father class को inherit किया गया है | father class को inherit करने के कारण केवल Son class का object बनाया गया है | अगर son class मे father class को inherit नही किया जाता | तो Grandfather class को run करने के लिए father class का भी object create करना होता है |
Code Explanation
class father = > father नाम की एक class create की गई है |
def display(self): display नाम का एक Function Create किया गया है |
class Son(father) = > Son नाम की Class मे father class को inherit किया गया है |
def show(self): = > show नाम का एक Function create किया गया है |
object = Son() = > Son class का object नाम का एक object बनाया गया है |
object.display() = > बनाए गए son class के object से father class के display function को call की गई है |
Multiple Inheritance
किसी एक class मे एक से अधिक class को inherit करने के लिए Multiple
Inheritance का उपयोग किया जाता है |
For Example
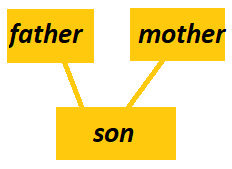 father और mother नाम की 2 classes है और son class मे father और mother class को inherit किया गया है | इस तरह से son
class मे
father और mother दोनों classes के कुछ गुण inherit हुए है | Multiple Inheritance से classes को inherit करने का code नीचे दिया
गया है |
father और mother नाम की 2 classes है और son class मे father और mother class को inherit किया गया है | इस तरह से son
class मे
father और mother दोनों classes के कुछ गुण inherit हुए है | Multiple Inheritance से classes को inherit करने का code नीचे दिया
गया है |
1class Father:
2    def display_Father(self):
3        print("I am Father class")
4class Mother:
5     def display_Mother(self):
6         print("I am Son class")
7class Son (Father , Mother):
8     def display_Son(self):
9         print("I am Son Class")
10
11object = Son()
12object.display_Father()
13object.display_Mother()
14object.display_Son()
I am Gradfather class
I am Son class
Code Explanation
class Father: = > Father नाम की एक Class Create की गई है |
def display_Father(self): = > display_Father नाम का एक Function Create किया गया है |
class Mother: = > Mother नाम की एक Class Create की गई है |
def display_Mother(self): = > Mother class मे display_Mother नाम का Function create किया गया है |
class Son (Father , Mother): = > Son नाम की एक class create की गई है जिसमे Father और Mother दोनों classes
को inherit किया गया है |
def display_Son(self): = > Create की गई Son Class मे display_Son नाम का एक Function create किया गया है |
object = Son() = > Son class को run करने के लिए Son class का object create किया गया है |
object.display_Father() = > Create किए गए Son Class के object से Father Class के display_Father() को Call
की गई है |
object.display_Son() = > create किए गए Son class के object से Son class के display_Son() को call की
गई है |
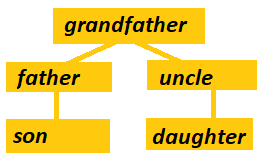
Multilevel Inheritance
पहली class को दूसरी class मे दूसरी class को तीसरी class मे inherit करना Multilevel Inheritance होता है |
For Example
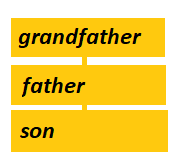
ऊपर दि गई image मे Grandfather , Father और Son नाम की तीन classes है जिस तरह से image मे Grandfather class के कुछ गुण Father class मे आते है | Father class के कुछ गुण Son class मे आते है उसी तरह से एक class को दूसरी class मे दूसरी class को तीसरी class मे inherit करना Multilevel Inheritance कहलाता है | Multilevel Inheritance का नीचे code दिया गया है |
1class Grandfather:
2    def display_Grandfather(self):
3        print("I am Grandfather class")
4class Father(Grandfather):
5     def display_Father(self):
6         print("I am Father class")
7class Son(Father):
8     def display_Son(self):
9         print("I am Son Class")
10
11object = Son()
12object.display_Grandfather()
13object.display_Father()
14object.display_Son()
I am Grandfather class
I am Father class
I am Son Class
Code Explanation
class Grandfather: = > सबसे पहले Grandfather नाम की एक Class create कि गई है |
def display_Grandfather(self): = > display_Grandfather() नाम का एक Function create किया गया है |
class Father(Grandfather): = > Father नाम की एक Class create की गई है जिसमे Grandfather नाम
की class को inherit किया गया है |
def display_Father(self): = > Father Class मे एक display_Father() नाम का एक Function create किया गया है |
class Son(Father) = > एक Son class create की गई है जिसमे Father Class को inherit किया गया है |
def display_Son(self): = > Son class मे display_Son() नाम का Function Create किया गया है |
object = Son() = > Son class को run करने के लिए Son class का object create किया गया है |
object.display_Grandfather() = > Son Class के object से Gradfather class के function को call की गई
है |
object.display_Son() = > Son class के ही object से Son class के display_Son() नाम के function को Call
की गई है |
Hybrid-Inheritance
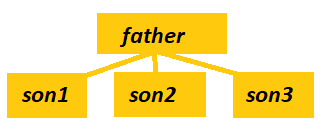
किसी एक class को एक से अधिक classes मे inherit करने के लिए Hybrid Inheritance का उपयोग किया जाता है | जैसे उपर दिए गए image मे father class को son1 , son2 और son3 classes मे inherit किया गया है | Hybrid Inheritance का code नीचे दिया गया है |
code Explanation
1class Father:
2    def show1(self):
3        print("I am Father class")
4class child1(Father):
5     def show2(self):
6         print("I am Child1 class")
7class child2(Father):
8     def show3(self):
9         print("I am Child2 Class")
10
11object1 = child1()
12object2 = child2()
13
14object1.show2()
15object1.show1()
16object2.show3()
17object2.show1()
I am Child1 class
I am Father class
I am Child2 Class
I am Father class
code Explanation
class Father: = > Father Name की एक Class बनाई गई है |
def show1(self): = > Father Class मे show1() नाम का Function Create किया गया है |
class child1(Father): = > Father Class के बाद Child1 नाम की Class create की गई है |
def show2(self): = > Child1 class मे show2() नाम का Function Create किया गया है |
object1 = child1() = > child1 class को run करने के लिए Child1 class का object create किया गया है |
object1.show2() = > child2 class को run करने के लिए Child2 class का object create किया गया है |
5.Hierarchical Inheritance
जब एक ही माता-पिता (Parent Class) से कई बच्चे (Child Classes) बनते हैं , उसे Hierarchical Inheritance कहते हैं | जैसे image मे दिखाया गया है कि एक father से 2 son और उन sons के childs . Multilevel Inheritance का नीचे code दिया गया है |
1class A:
2    def show1(self):
3        print("I am A class")
4class B(A):
5     def show2(self):
6         print("I am B class")
7class C(A):
8     def show3(self):
9         print("I am C Class")
10class D(B , C):
11     def show4(self):
12         print("I am D Class")
13
14
15object = D()
16object.show1()
17object.show2()
18object.show3()
19object.show4()
I am A class
I am B class
I am C class
I am D class
Code Explanation
class A: = > A नाम की एक class create की गई है |
def show1(self): = > A Class मे show1() नाम का Function create किया गया है |
class B(A): = > B नाम की Class Create कि गई है जिसमे A class को inherit किया गया है |
def show2(self): = > B class मे show2() नाम का Function create किया गया है |
class D(B , C): = > एक D नाम की Class है जिसमे B और C दोनों class को inherit किया गया है |
def show4(self): = > D class मे show4() नाम का Function create किया गया है |
object = D() = > D class के functions को run करने के लिए D class का object create किया गया है |
object.show1() = > D class के object से A class के show1() function को call की गई है |
2. Encapsulation
अपने data को सुरक्षित रखने के लिए Encapsulation का उपयोग किया जाता है | Encapsulation का मतलब है | कि data को छुपाना ताकि कोई भी बाहरी इंसान data को बिना permission के access ना कर सके |
Rules :
Encapsulation का उपयोग करने के rules नीचे दिए गए है |
1. Variable को hide करना : Encapsulation का उपयोग ही data को secure बनाने के लिए किया
जाता है और data को variables मे store किया जाता है , इसलिए variable को ही hide कर देने से data secure हो जाएगा
variables को private बनाने के लिए __ (double underscore) का उपयोग किया जाता है | किसी भी variable के आगे
__ (double underscore) का उपयोग करने से वो variable private बन जाता है |
2. Getter and setter method : अगर variables को ही hide कर दिया जाएगा तो data तो access नही किया
जाएगा और लिखे गए program का उपयोग भी नही हो पाएगा , इसलिए variables को private बनाने के बाद Getter
and setter method का उपयोग करे ताकि data के साथ काम किया जा सके |
3. same place : Encapsulation का नियम है कि create किए गए data (variables) और उन पर काम करने
वाले
methods को एक ही जगह पर रखा जाए |
4. Data Hiding : उपयोग User को केवल methods का interface पता होना चाहिए,
अंदर data कैसे store/modify हो रहा है — यह hidden रहना चाहिए | नीचे एक Encapsulation का उदाहरण दिया गया है |
1class Fruits:
2    def set(self, name):
3        self.__name = name
4
5    def show_name(self):
6         print("The fruit name is", self.__name)
7
8object = Fruits()
9object.set("Apple")
10object.show_name()
The fruit name is Apple
Code Explanation
class Fruits: = > Fruits नाम की class create की गई है |
def set(self, name): = > Fruits class मे set() Function create किया गया है |
self.__name = name = > name variable की value set() के name variable के बराबर set की गई है |
def show_name(self): = > Fruits class मे एक show_name का Function create किया गया है |
object = Fruits() = > Fruits class का Object create किया गया है |
object.set("Apple") = > Create किए गए Object से Fruits Class के set() function को call की गई है |
object.show_name() = > Object से Class के show_name() function को call कि गई है |
Polymorphism
Polymorphism OOPs का एक बहुत ही Interesting और महत्वपूर्ण concept है | Polymorphism का मतलब है कि
"एक नाम , कई रूप" | यानि Polymorphism Python मे किसी एक ही नाम के function , method ,class को अलग -
अलग काम करने की आज़ादी देता है |
“Poly” का मतलब है कई, और “Morph” का मतलब है रूप |
इसलिए Polymorphism = कई रूपों में काम करने की क्षमता।
For Example तीन classes बनाई गई तीनो classes मे एक ही function का होना |
run करने पर तीनो classes मे से कब कौन-सा function run होगा इसके लिए
Polymorphism का उपयोग किया जाएगा |
नीचे Polymorphism का code दिया गया है | जिसमे
2 classes create की गई है और दोनों classes मे sound नाम का function create किया गया है | अब दोनों function मे से कब कौन - सा function चलेगा | ये तय करने के लिए Polymorphism का उपयोग किया गया है |
1class Cat:
2    def sound(self):
3         return "Meow"
4class Dog:
5    def sound(self):
6        return "Bark"
7
8def listen_sound(animal):
9    print(animal.sound())
10
11dog = Dog()
12cat = Cat()
13
14listen_sound(dog)
15listen_sound(cat)
Meow
Bark
code Explanation
class Cat: = > cat नाम की class create की गई है |
def sound(self): = > sound नाम का function create किया गया है जो कोई parameter नही लेता है
|
return "Meow" = > cat class के sound function को call करने पर sound function Meow को return करेगा
|
class Dog: = > इसी तरह Dog class को create किया गया है |
def listen_sound(animal): classes के बाहर listen_sound नाम का function create किया गया है
|
जिसमे animal नाम के parameter को pass किया गया है |
print(animal.sound()) = > animal sound function को print करेगा |
dog = Dog() = > Dog class का dog नाम का object create किया गया है |
cat = Cat() = > Cat class का cat नाम का object create किया गया है |
listen_sound(dog) = > listen_sound function को call की गई है जिसमे dog object को pass किया गया
है |
listen_sound(cat) = > listen_sound function को call की गई है | जिसमे cat object को pass किया गया
है
Polymorphism के Rules
1. classes मे same functions , methods name होने चाहिए |
2. classes मे same functions , methods name same होने चाहिए पर हर class के according हर function का अपना अलग
काम होना चाहिए |
3. Polymorphism मे किसी दूसरी class को inherit करने जरूत नही है |
4. Operators जैसे +, * अलग - अलग data type पर अलग - अलग तरह से काम करते हैं | यह भी Polymorphism का एक rule है |
5. Polymorphism मे Functions , Methods , variables public होने चाहिए Private Functions etc. होने पर Polymorphism
concept काम नही करता है |
Polymorphism के लाभ
1. create किए गए एक ही function , method से code को control किया जा सकता है |
2. defin किए गए पूरे code मे changes करने की बजाए केवल function मे changes कर सकते है |
3. Same classes भी create कि जा सकती है जिससे पूरे बडे code को लिखने की जरूत नही |
4. Polymorphism flexible architecture तैयार करने में मदद करता है।
5. एक जैसा नाम रखने से Program लिखना Easy और साफ़ रहता है।
4.Constructor
Python Programming मे Constructor एक method है | जो अपने आप class का object बनाने पर run हो जाता है | Constructor को __init__() से defin किया जाता है | नीचे एक Constructor को create किया गया है |
1class ClassName:
2
3    def __init__(self, parameters):
Code Explanation
class ClassName: = > class Keyword से class create की जाती है | ClassName class का नाम देना |
def __init__(self, parameters): = > def से function create किया जाता है | __init__
से Constructor create किया जाता है |
नीचे दिए गए Code Editor मे एक Constructor को create किया गया है |
1class name:
2    def __init__ (self):
3        print("my name is Shubham")
4
5object = name()
my name is Shubham
code Explanation
class name: = > name नाम की class create की गई है |
def __init__ (self): = > एक Constructor Function create किया गया है |
object = name() = > name नाम की class का object create किया गया है |
key points
1. constructor को __init__ से create किया जाता है |
2. class का object बनाते ही class मे create किए गए functions , methods अपने आप call हो जाते है |
3. Self constructor के अंदर object को represent करता है |
4. Parameterized और default दो types commonly होते हैं
Constructor के लाभ
1. run time पर class अपने आप run हो जाती है |
2. केवल class का object बनाने की जरूत object से class के function , methods को call करने की जरूत नही |
3. Constructor के उपयोग से functions मे values set करने का अपना standard तरीका है |
4. Constructor के उपयोग से लिखा गया code clean और समझने मे आसान होता है |
You have completed This Chapter ! 🎉
Now you can choose any one of the following options to test your knowledge :
Help Center
Users and we all help you together .